Since we’re so close to getting this car on the road, we actually didn’t have all that much to do this week. I washed it, we mounted the hood and the bumper, replaced all the exterior lights so it at least looks more street legal, and did a whole lot of cleaning. We also took it for two more test drives, because why not. Week 16 turned out pretty well.
Spoiler alert, this thing is an absolute blast to drive, even when you can’t go more than 45mph.
The Hood
We grabbed 4 8×1.25 nuts from Lowes, which were the correct size according to the internet, and what would you know they fit. That was quick. Not sure it deserves its own section, but I do need to get a hood prop/stick/pipe/thing to hold the hood up while we work on it, though hopefully we won’t need to be under there all that often for more than routine maintenance and checks now.
Can it be cleaned?
You bet it can! Aesthetics is one of the main areas in which this car has been a bit lacking, and naturally the last on the list of priorities before finished this project. Given the choice between spending money/time on something mechanical, like brakes, or the paint, that’s a really easy decision. However, now that almost everything mechanical is done, we can start working on those more aesthetic tasks. First on the list: washing it.


Other than literally anytime I wash my Subaru’s wheels, this was some of the darkest water I’ve personally seen come off of a civilian vehicle (LMTVs and HEMTTs after the field are on a different level). Plus I don’t usually have to scrub mildew off of those. I didn’t use any pictures of the rest of the body before and after washing it, as honestly it didn’t that much different on the camera. I also spent about 2 hours scrubbing every single piece of interior trim until it was finally clean, plus the soft top which needed some elbow grease.


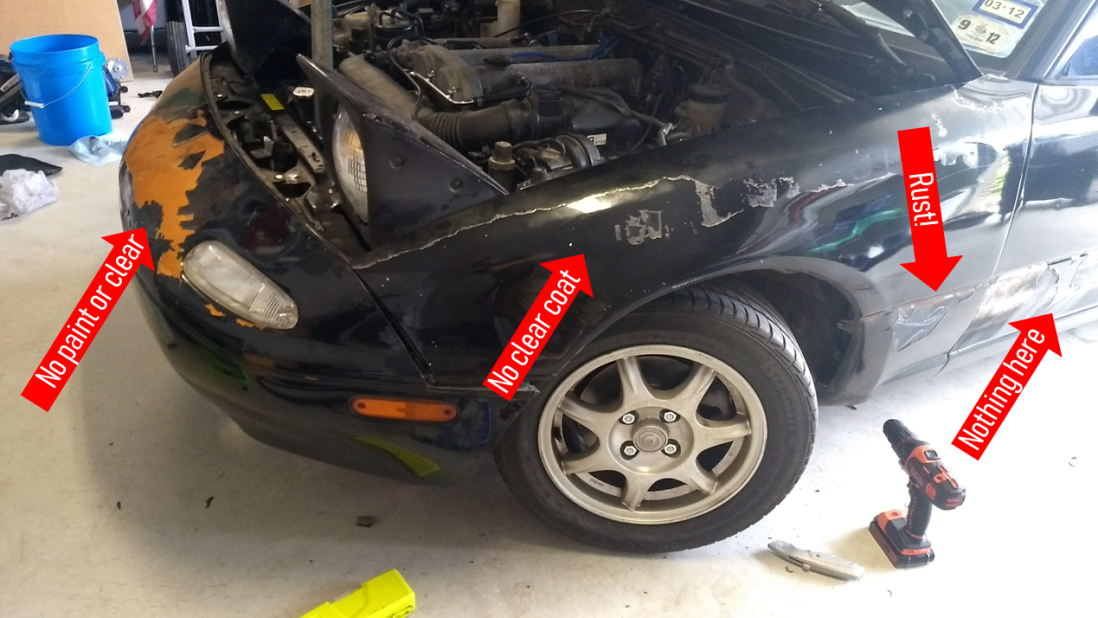
I don’t know much about paint, but I do know bad paint when I see it. It seems like the back half of the car fared way better while it was outside versus the front, for some reason. The front fenders have almost no clear coat left and have a few patches of thin black paint. On the flip side, the back looks great, it’s just faded a little bit but I don’t see why it won’t come back to life with a little TLC. A good test of this is to get the car wet, which shows you what to expect if you spend a little time restoring the paint. I couldn’t believe how clear it was! An actual mirror finish, minus a few small dings and such on the bottom of the fenders. Still though, what a result. Hopefully, they aren’t too hard to bring back to life so they look like this all the time.
Fluids
So, I’ll be the first to admit that I didn’t do an incredibly thorough walk around of the car before we took it out for its first test drive last week. Some things I would have noticed? No fluid in the clutch master cylinder at all, and really old fluid in the brake system. Perfect for an initial test drive of a kinda janky car, right?


All of this is an easy fix, though, as I just needed to siphon out the old brake fluid, then add fresh DOT 3 to everything. Done!
Front Bumper
I finally got around to putting the front bumper on, though I admit it isn’t exactly safe for long term use. Zip ties are great, but they aren’t known for resisting vibrating sharp metal very well, so it’s best we put proper fasteners on now. After some internet sleuthing, it turns out the bolts we needed are M6 bolts with a pitch of 1 and length of about 12. Instead of ordering the actual OEM bolts online, we just went to Lowes and bought a few packs for almost nothing. Do they have a flanged head to help spread the clamping force? Of course not, they’re just cheap hex head bolts, but we can just add some washers in the future. Luckily, I actually found some flanged head bolts and some washers in the magical garage of giving, so I’m calling that done!

On the plus side, the car is actually starting to look somewhat roadworthy! Initially, I thought the driver’s side would need a little work, as it’s bent out of whack by about 4 inches at the end, but the passenger side lined up great. It turns out, I just needed to encourage the bumper a little bit more and it lined up great! With the help of a bunch of zip ties and some slight modification with a rotary tool. I even mounted the front license plate bracket so we can put both new plates on as soon as that happens.
Lights
We got very, very lucky with the electronics in the car so far. Once we figured out the whole “no main ground wires” thing, nearly all of the lights for the entire car turned on without any fuss. The only lights that didn’t work for us were the front blinkers, which upon further investigation probably had something to do with me being able to spin bulb inside of its base.
Not content to simply replace the two nonfunctioning blinker bulbs in the front, I went ahead and ordered new bulbs for the entire exterior of the car. Honestly, shipping was significantly more than the bulbs I originally needed to order, something like $6.99 for $1 worth of bulbs, so I decided to make it worth my time and order all the bulbs I think I could possibly need for this car. Plus, this way we have a bunch of extras for our other cars.
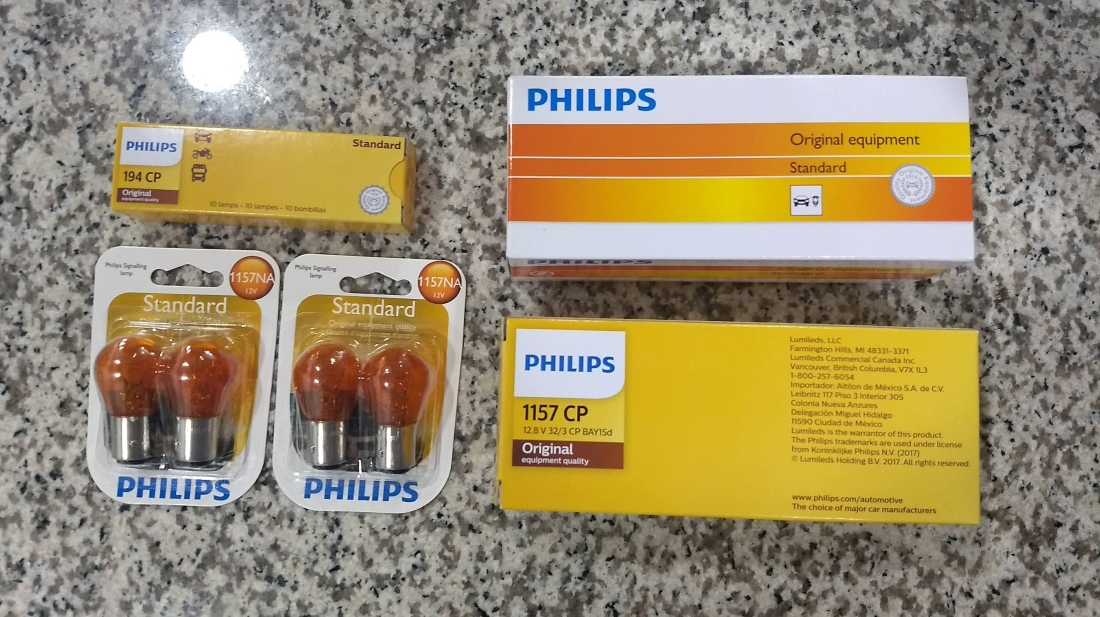
Lucky for us the reason the two front blinkers weren’t blinking was because of bad bulbs, just like I was hoping for, and the same was true for the front markers. That was quick and easy…for once. One step closer to being street legal!
Shift Knob
So, initially, I couldn’t find the stock shift knob anywhere I looked (in the car, not exactly an exhaustive search). In light of that fact, I decided to do something cool and found this online, which is a replica of a B8 flight stick used in a ton of aircraft designs. How cool would that be as the shift knob in the Miata? All I need to do is grab two M10x1.25 nuts that’ll get glued in between the two halves of the print and we should be good to go!


That was the plan, at least, until I found the stock shift knob in a bag of bolts. Well, I guess I’ll keep the stock shift knob on there until we get it on the road and everything, which will give me time to do some finishing on the 3d printed flight stick if I want to go that route.

There’s also the small problem of the Texas heat potentially destroying the PLA plastic that I used to print the flight stick shifter. Theoretically, PLA starts getting soft at around 70°C but doesn’t really melt until around 180°C, which should not be a temperature that the interior of this car should get anywhere close to. Seeing as 70°C is 158°F, we shouldn’t have a problem on our hands, at least not at first. Maybe it’ll slowly deform? Not sure, but I guess we’ll have to test it out at some point.
New Paint?
There are quite a few areas on the car that just need a new coat of paint. They can’t be salvaged. At the same time, the entire back half of the car is mostly fine and just needs a cutting disc, new clearcoat, then some wax. So it’d be a waste to respray the entire car, I’d think, plus I’m not made of money nor do I have a money tree. So what to do?
After some research, it seems like there is a way to get a solid paint job without investing a ton of money in a compressor, spray gun, hoses, fittings, etc. not to mention setting up a spray booth in our garage and paying $200 a gallon for professional automotive paint. All you need is some high-density foam rollers, a quart or two of black Rustoleum, and some mineral spirits or acetone.
Here are a few different threads on the best way to do this and what people have been able to accomplish with a paint roller. All in, it sounds like we could expect to spend about $60 doing the front half of the car, as 98% of the work and expense is going to be in the prep work (lots of sandpaper and a little body filler).

Can’t argue with the results! This definitely isn’t going to happen this week or even next week, but it’d be great to get this done before it officially gets on the road.
To Do List
We got a lot done this week and now we’re so close to getting it on the road. Here’s what we have left.
- Bleed brakes
- Order and install Moss Miata shifter rebuild kit
- Order radio
- Adjust parking brake
- Register/insure
- Replace upper power steering hose (forgot I ordered a new one)
I originally had new speakers on this list, as I figured the chances of 22-year-old speakers in a convertible surviving unscathed were near zero, but as I was cleaning the door panels I discovered someone already beat me to it! All I could see was that there were red, which isn’t exactly helpful, but I plan on getting a part number or something here soon whenever I think about it and pop the door cards off. Either way, potentially one less thing for us to spend money on, which I’m down for!
