So, August has been one of the busiest, if not the busiest, month of printing I’ve ever had. I messed around with my printing and retraction speeds, as well as print temperatures and fan curves, and I’m now almost to the point of set it and forget it. Almost. As usual, the first layer is the most important and requires careful attention. As a general rule, if the first layer sticks fine and nothing turns to spaghetti, the rest of the print should be fine barring a problem with the gcode or an act of God. Or a problem with the gcode God, which you have to really watch out for.
VR Gun Stock
I technically finished printing the VR gun stock on July 31st, so I met my goal of getting it finished by the end of the month. However, the original design only included 3 sections of stock, which I guess strikes a good balance of smg feel vs battle rifle for games, but I have long arms and really enjoy using rifles in games versus shorter weapons. Because of this, I just printed the middle section again and added it to my stock, giving me another 5.5 inches or so of length. Want to make a joke so badly, but this is a public blog and I’m an upstanding person. Or something.


So, how does it work? It’s amazing! With the force feedback from the controllers, coupled with the VR headset itself and this stock, I really feel like I’m getting at least 90% the experience of shooting a real rifle/pistol/shotgun while flailing around in my game room and having people silently judge me. And that’s a lot cheaper than going through rounds at the range like they’re going out of style. If you want one of your very own, here’s where to find the files.
Flight Stick Shifter


I mentioned this in my last miata project post, but since it was, in fact, printed in August, I figured I would include it here as well. Basically, this is a replica of a B8 flight stick that you can glue two nuts into and use as a really cool shift knob. I haven’t mounted it in either of the stick shift cars we have, but hopefully that’ll happen soon, though I’m not sure how long it’ll last in the Texas summer heat.
CPU Cooler Cover
The stock Cooler Master Hyper 212 Evo cpu cooler is a great budget cooler but isn’t exactly the best looking. The top is unfinished, shiny metal, and it doesn’t really fit with the rest of my computer’s black and white theme. However, someone made this model that covers up this portion of the cooler and instead displays the AMD or Intel logo there. Since this is an Intel 7600k cpu, I naturally picked the Intel version, then painted it white.


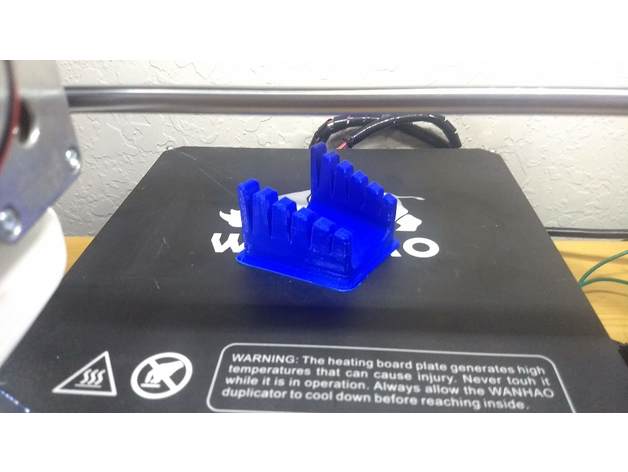
Soldering Helper
I don’t always need a soldering iron, but when I do, I always end up needing a second or third pair of hands to go with it. Unfortunately, I don’t have any super cool soldering jigs already, so I went looking at the usual suspects: thingiverse. I haven’t gotten the opportunity to use it, but I imagine that won’t last long.
Headset Wall Mount
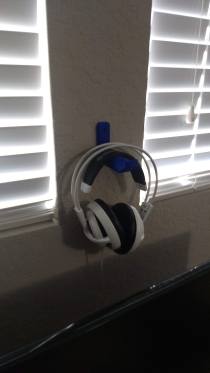 In an effort to cleanup my desk, I’ve started looking at the common devices/tools I use and trying to figure out some way to mount them to the wall, hide them behind my monitor, or any way to keep them organized and hopefully out of site. One simple solution I found was for my gaming headset, which I could easily mount to the wall above my monitor.
I printed out this file, stuck some awesome 3m double sided tape to it, then squished it on the wall. Not much to this one, but it was fun and I use it every day now.
Webcam Upgrade
My old smartphone has been working ok as a webcam for OctoPi, but there are a few problems I’ve run into. First, the resolution is terrible. Just awful. I knew this would be a problem before I got it going, as I had to use the front-facing camera instead of the much better rear-facing camera because of a well-known issue with the HTC One M7 where the picture turns purple. Second, the phone isn’t exactly mounted securely, as it’s zip tied to a battery bank and the carriage of the printer. Third, the phone actually gets pretty hot while running just the front facing camera, which I guess shouldn’t be that surprising considering the phone has to do a ton of processing for the camera and the ip cam app, and do all of that for hours and hours at a time.
A webcam would solve all of these issues, especially if I found one that was natively supported by OctoPi and people had already modeled some cool mounts for my printer. As luck would have it, there are quite a few models out there that work well with OctoPi, so I just picked the cheapest one that had a decent resolution and I would have some confidence in. After a quick calculation of some random gift cards I somehow forgot about, I decided my best option would be a Logitech C270 webcam for around $20. It’s only 720p @ 30 fps, and there was a C920 on sale for 50% that was very tempting and would do 1080p @ 60, but ultimately this is only to monitor the print while I’m out of the house and get some neat time-lapse. And for half the price of the C920, the C270 should do just fine.
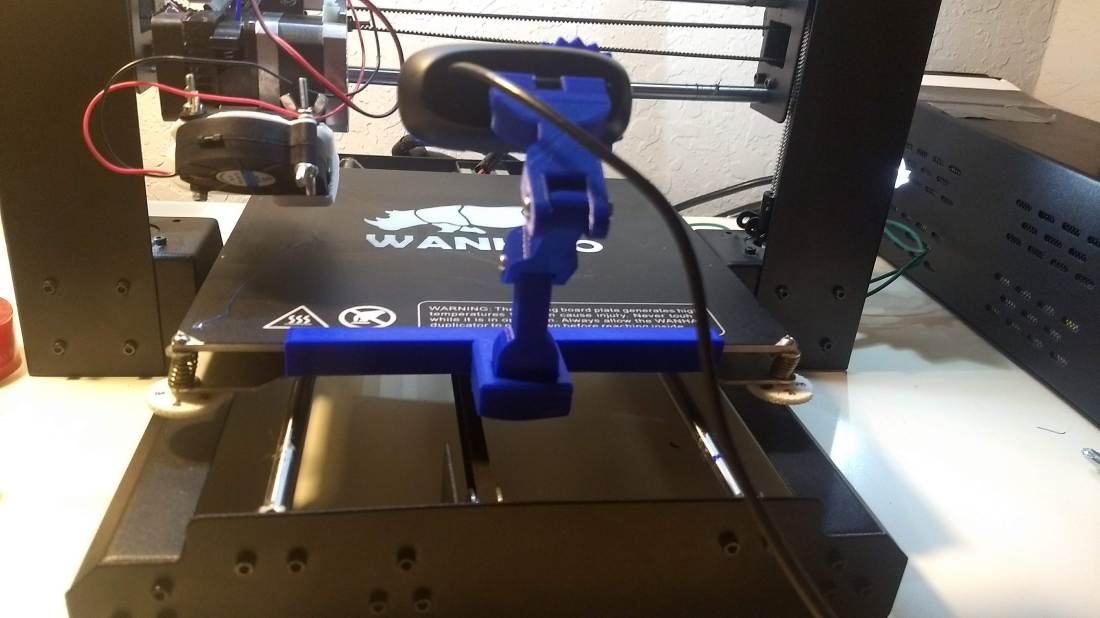
While I waited, I found some files on Thingiverse that would help me get it set up for my printer in hopefully a less jank fashion. I managed to find a bed mount, some compatible arms, and a webcam mount all made for the C270 and my Duplicator i3/other Prusia clones. There is apparently one small issue with this webcam, which is the fact that the focus is set completely wrong for this application. Without modification, the picture looks terrible and won’t be any better than my crappy smartphone setup. Once again, though, the internet pulls through and other people already figured out how to fix this.
Once you take the front of the casing off the webcam, you can see the camera module on the PCB and the focus ring around it. All you have to do is take off the small blob of hot glue holding the ring stationary, then you can adjust the focus until your print bed looks clear. If you want to make this process easier in the future, in case you want to move your camera mount around or need to print something large that will necessitate a focus shift, you can print a new front casing with an external focus ring adjuster built in.
I used this case file and this thumbwheel for my webcam, and aside from the first layer being ugly, it works great.


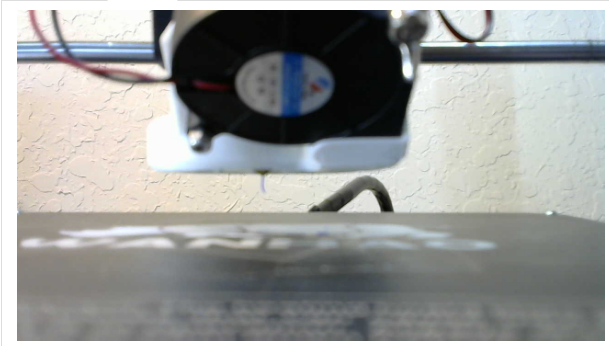
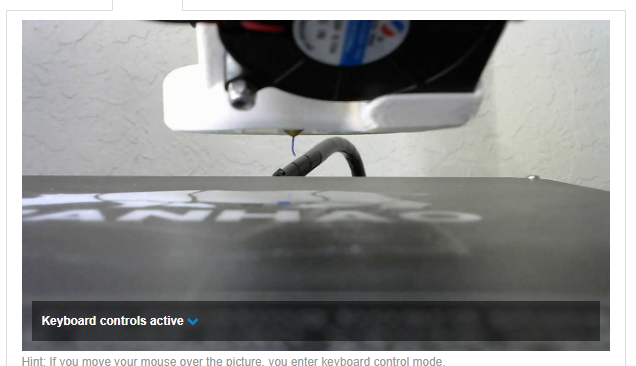
For reference here’s the before and after views from focusing the camera.
And here’s what the final setup looks like, though I ended up scooting the mount all the way to the right due to a clearance issue with the print head and my upgraded cooler.
In case you forgot, here’s how bad the old camera was versus the new one. Also, I apologize for the ironically bad picture quality, as I just took screenshots of time lapses I captured. Also, that is the C270 at night versus the smartphone in ideal conditions during the day.


Unfortunately, all is not rainbows and unicorns. After about 10 hours of printing over the two days it was setup, my webcam suddenly stopped responding. After looking at the output of dmesg, it looked like the pi was unable to identify the usb device now. Great. To ensure it was a problem with the webcam versus the raspberry pi, I plugged the C270 into my Windows 10 desktop and …. nothing happened. No lights, no drivers being loaded, nothing happening in device manager. Looks like it died, somehow, within two days of being setup. Not one to give up, I looked through my box o’ computer things and found an old Nexus 7 (2013) that has a broken screen and digitizer. Maybe this will work as a temporary camera…
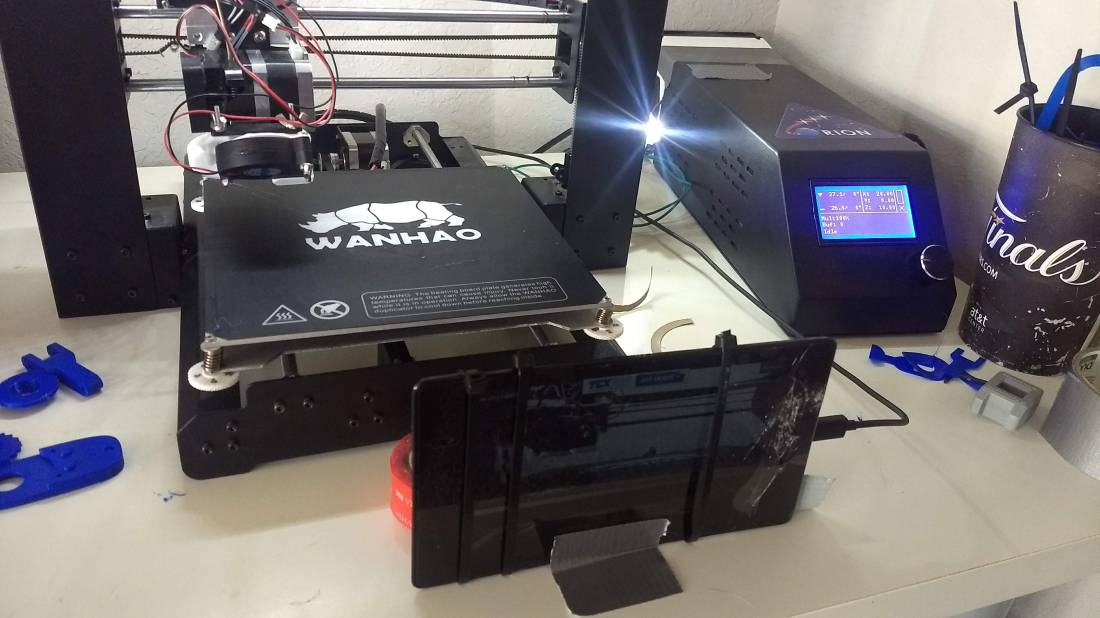
Nexus 7 Tablet as a camera
Honestly, setting up the tablet was almost identical to setting up my old smartphone, so I won’t rehash all of that. The main difference was that the last time I used this tablet was four years ago, so you could say it was a little bit out of date. It took two solid days of downloading and installing updates until I got to the point where I could install the IP Camera app and get it running, but run it did. And who knew, it’s proper 1080p @ 30 fps instead of the potato that was the HTC One M7.
One issue I ran into pretty quickly was apparent when I touched the back of the tablet after running the app for about 10 minutes as a test: it was getting pretty toasty. This really shouldn’t have been a surprise, as I imagine video encoding and such takes a lot of cpu horsepower. For fun, I downloaded an app that would show the cpu temp and let it run for about 3 minutes while streaming the video. The result? A high of 83 °C, and I’m sure it would get hotter as time went on. While this isn’t dangerous or anything, I’m sure the cpu would start throttling pretty soon and cause a drop in video framerate. Luckily, I have a bunch of computer parts and have a bit of an obsession with having parts run as cool as possible, so you can see where this is going.


I had a couple Pentium II’s laying around, for some reason, and one of them had a heatsink still installed. I bent the mounting brackets out of the way and had to take my rotary tool to the two nubs that would prevent the whole fixture from mounting flatly to the tablet.
Once that was taken care of, I took the cover off the back of my Nexus 7 and found the heatsink. To make sure nothing shorted out when I mounted the aluminum heatsink, I taped off exposed pcb and surface mount components with some electrical tape, then laid down some thermal paste for the new cooler. I had to mount it lengthwise down the tablet, instead of across it like you’d think, because it was too wide and would actually be in the frame of the cameras. I could fix that by cutting off some of the fins, but I’ll leave that part for an undisclosed future date.


So, how did it do? Well, after running the camera for about 15 minutes it topped out at 62°C, which is a 21 degree drop in temperature! Honestly, I need to remount the cooler, as there are some very small protrusions that prevent it from sitting completely flush and I didn’t use enough thermal paste to make contact with everything. But still, for about half an hour of work, that’s not a bad result!
Who knows, maybe I’ll give a dedicated webcam another shot here soon. Or at least print a heatsink mount, a new case, and maybe a proper mount for the tablet. This could easily go either way.
